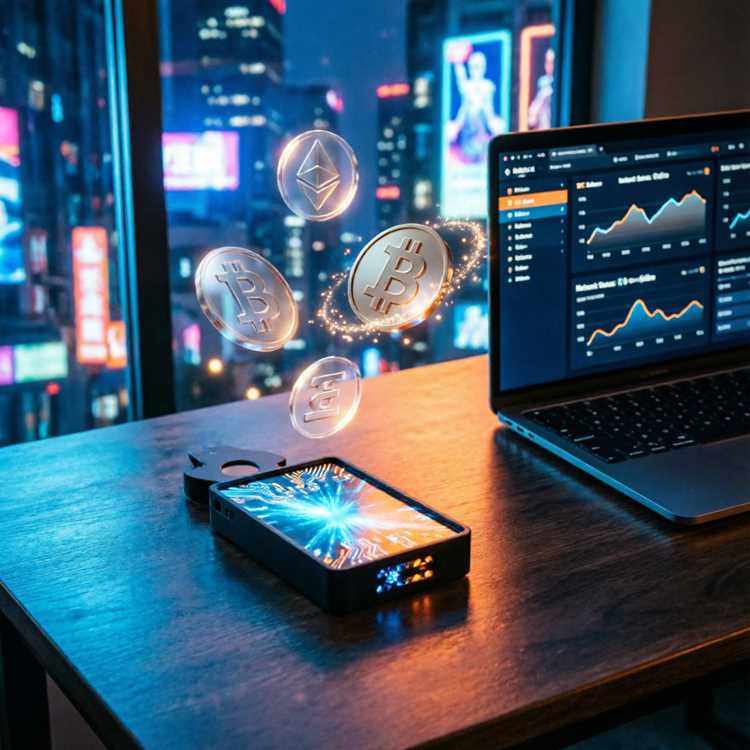
Setting up a hardware wallet is the first step toward true crypto ownership. This Ledger Wallet Setup Guide – Easy Step-by-Step walks you through every stage. You will learn how to install software, initialize your device, and manage digital assets. Following this guide ensures your funds stay safe from online threats.
Many users feel overwhelmed by technical terms. Do not worry. This process is simpler than you think. By the end, you will have a working wallet ready for transactions. Let us begin with the basics.
Why Use a Hardware Wallet for Crypto Storage?
Keeping coins on an exchange carries risk. Hacks and phishing attacks target online wallets regularly. A hardware wallet stores private keys offline. This makes remote theft nearly impossible. Using a simple crypto wallet gives you full control over your funds.
Software wallets on phones or computers connect to the internet. Malware can steal your seed phrase. Hardware devices sign transactions without exposing keys. Even if your computer is infected, your assets remain safe. This is why millions choose cold storage.
Ledger devices support over 5,000 coins and tokens. You can manage Bitcoin, Ethereum, Solana, and many others. The device itself is small and portable. It fits in a pocket or a safe. For a deeper look at models, check our Ledger wallet comparison.
Key Benefits of Cold Storage
- Private keys never leave the device.
- Transactions require physical button confirmation.
- Backup seed phrase recovers funds if device is lost.
- Compatible with major DeFi platforms and exchanges.
What Comes Inside the Box?
Opening your package reveals several items. Each component serves a specific purpose. Knowing what you have helps avoid mistakes. Counterfeit devices exist, so verify authenticity first.
Inside the box you will find the hardware device, a USB cable, and recovery sheets. Some models include a keychain strap or a protective case. The Nano S Plus comes with a USB-C to USB-A cable. The Nano X includes a Bluetooth antenna for wireless use.
Always check the security seal. If the seal is broken, do not use the device. Contact support immediately. For a genuine product, visit our page on a Genuine Ledger wallet.
Accessories and Their Uses
| Item | Price (approx) | Compatibility | Use Case |
|---|---|---|---|
| USB-C Cable | $5 | All models | Charging and data transfer |
| Recovery Sheets | $3 | All models | Writing down seed phrase |
| Protective Case | $15 | Nano X, Nano S Plus | Preventing scratches and drops |
| Keychain Strap | $8 | Nano S Plus | Portable carrying |
| Bluetooth Dongle | $20 | Nano X only | Wireless connection to phone |
Downloading and Installing Ledger Live
Ledger Live is the companion app for your device. It manages installations, transactions, and portfolio tracking. Download it only from the official Ledger website. Fake apps exist on app stores. Always double-check the URL.
Installing Ledger Live takes about two minutes. Choose the version for your operating system. Windows, macOS, Linux, iOS, and Android are all supported. After downloading, run the installer and follow the prompts.
Once installed, open the application. You will see a welcome screen. Select "Initialize a new device" or "Restore from recovery phrase." For first-time users, choose the new device option. This begins the Ledger Live installation process.
System Requirements
- Windows 10 or later (64-bit).
- macOS 10.15 or later.
- Linux Ubuntu 20.04 or later.
- iOS 14 or later for mobile.
- Android 8 or later for mobile.
- USB port or Bluetooth 4.0.
Connecting Your Device to the Computer
Plug the USB cable into your computer and the device. The screen lights up and shows the Ledger logo. Press both buttons simultaneously to proceed. This action confirms you are ready to set up Ledger wallet.
Ledger Live will detect the device automatically. If it does not, try a different USB port or cable. Some older cables only support charging, not data. Use the cable that came in the box. For mobile users, enable Bluetooth on the Nano X.
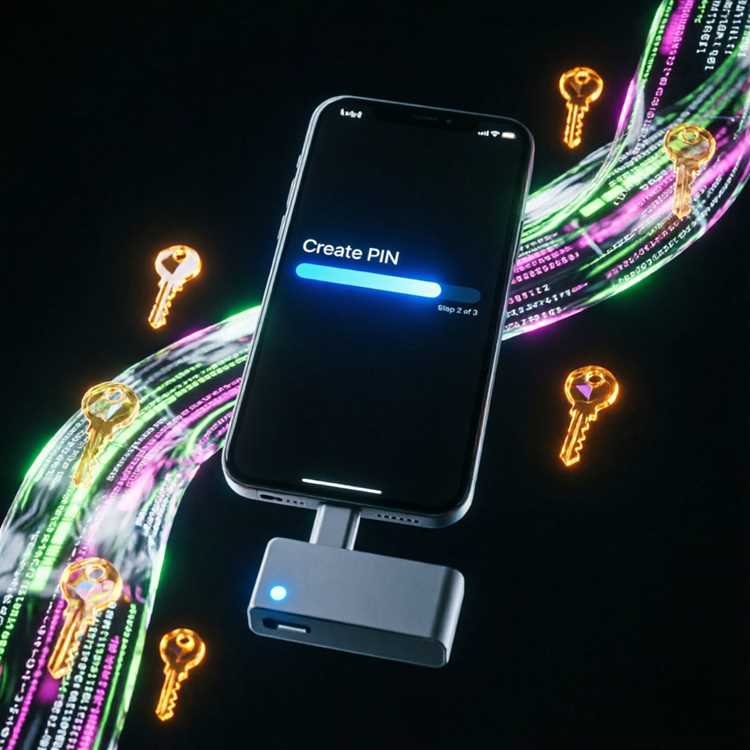
After connection, the app asks you to choose a PIN code. This code unlocks the device. Choose a 4 to 8 digit PIN. Do not use obvious numbers like 1234 or your birth year. Write down the PIN separately from your seed phrase.
Troubleshooting Connection Issues
- Restart Ledger Live and reconnect the device.
- Try a different USB port on your computer.
- Disable antivirus temporarily during setup.
- Update USB drivers on Windows systems.
- Use the original cable provided by Ledger.
Initializing the Device and Generating a Seed Phrase
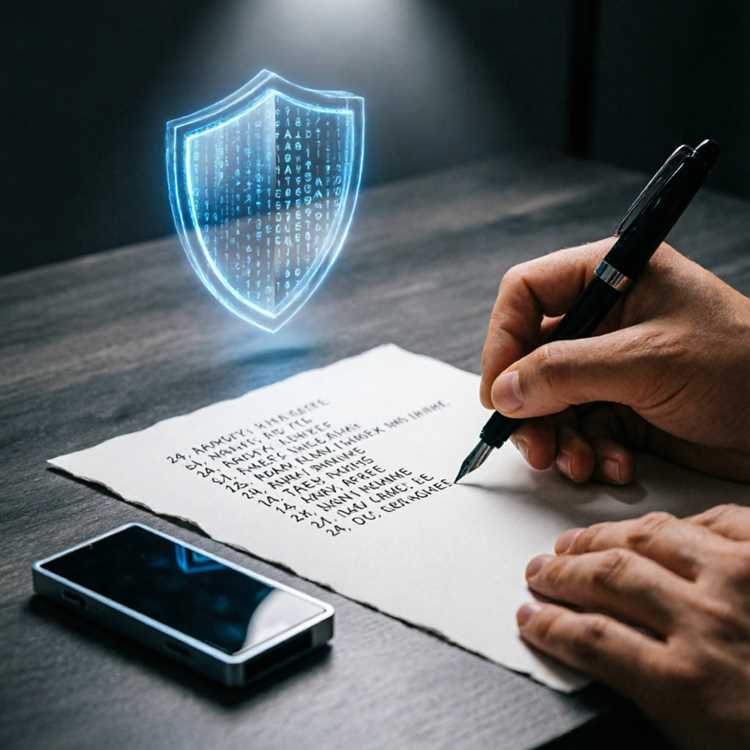
This step is the most important part of the setup. The device generates a 24-word recovery phrase. This phrase is the master key to your funds. Never share it with anyone. Never type it into a website or app.
Ledger Live prompts you to confirm the phrase. The device screen shows each word one by one. Write them down on the provided recovery sheets. Use the correct order. A single mistake can make recovery impossible.
After writing all 24 words, the device asks you to verify random words. This confirms you recorded them correctly. Take your time. Rushing leads to errors. Store the recovery sheets in a safe place. A fireproof safe or a bank deposit box works well.
For additional safety, consider a crypto wallet recovery service. These services store encrypted copies of your phrase. They add an extra layer of protection against loss or damage.
Seed Phrase Safety Rules
- Never store the phrase digitally (photos, cloud, email).
- Use multiple copies stored in different locations.
- Do not show the phrase to anyone, even support staff.
- Consider a metal backup for fire and flood protection.
Installing Blockchain Apps on Your Device
Ledger devices do not support all coins by default. You must install specific apps for each blockchain. For example, Bitcoin requires the Bitcoin app. Ethereum needs the Ethereum app. Each app takes up storage space.
Open Ledger Live and go to the "Manager" section. Connect your device and unlock it with your PIN. The manager shows available apps. Click "Install" next to the app you need. The process takes about 30 seconds per app.
The Nano S Plus has 1.5 MB of storage. This holds about 100 apps. The Nano X has 2 MB, allowing for more apps. The Nano S (original) has only 320 KB. You may need to remove apps to install new ones. This does not affect your funds.
Popular Apps and Their Sizes
- Bitcoin app: 40 KB.
- Ethereum app: 60 KB.
- Solana app: 50 KB.
- Polkadot app: 70 KB.
- Cosmos app: 45 KB.
Adding Accounts and Receiving Your First Coins
After installing apps, you can add accounts. Go to the "Accounts" tab in Ledger Live. Click "Add account" and select the cryptocurrency. The app generates a public address for receiving funds. This address is safe to share.
To receive coins, copy the address or scan the QR code. Send funds from an exchange or another wallet. Wait for network confirmations. Bitcoin requires 3 confirmations. Ethereum requires 12. Your balance updates automatically in Ledger Live.
You can manage multiple accounts for the same coin. For example, have one Bitcoin account for savings and another for trading. Each account has a separate address. This helps organize your portfolio. For bulk purchases, consider a Multiple Ledger pack.
Supported Assets Overview
| Asset | App Required | Max Supply | Network Fee |
|---|---|---|---|
| Bitcoin | Bitcoin | 21 million | Variable |
| Ethereum | Ethereum | Unlimited | Gas based |
| Solana | Solana | Unlimited | $0.0002 |
| Polkadot | Polkadot | Unlimited | 0.01 DOT |
Sending Transactions and Confirming on Device
Sending crypto requires physical confirmation. This prevents unauthorized transfers. In Ledger Live, click "Send" and enter the recipient address. Double-check the address. Malware can change copied addresses in your clipboard.
Review the transaction details on your computer screen. Then check the device screen. It shows the amount, fee, and recipient. Press both buttons to confirm. The device signs the transaction without exposing your private key.
After confirmation, the transaction broadcasts to the network. Ledger Live shows the status. You can track it on a block explorer. For large amounts, send a small test transaction first. This verifies the address is correct.
Transaction Confirmation Steps
- Enter recipient address in Ledger Live.
- Verify address on device screen.
- Check amount and network fee.
- Press both buttons to approve.
- Wait for network confirmations.
Using Ledger with Third-Party Wallets and DeFi
Ledger devices work with many third-party interfaces. MetaMask, Phantom, and Yoroi all support hardware wallets. This allows you to use DeFi apps while keeping keys offline. Connect your device via USB or Bluetooth.
For Ethereum-based DeFi, use MetaMask with Ledger. Select "Hardware Wallet" during setup. Your Ledger addresses appear in MetaMask. Approve transactions on the device. This works for swapping, lending, and staking.
Solana users can connect to Phantom wallet. Choose "Connect Hardware Wallet" and select Ledger. Sign transactions on the device. This method protects against dApp scams. Always verify transaction details on the device screen.
For a wider selection, browse our special edition hardware wallet options. These offer unique designs and the same security features.
Compatible Third-Party Wallets
- MetaMask (Ethereum, BSC, Polygon).
- Phantom (Solana).
- Yoroi (Cardano).
- Electrum (Bitcoin).
- MyEtherWallet (Ethereum).
Updating Firmware and Managing Device Settings
Firmware updates bring new features and security patches. Ledger releases updates every few months. Check for updates in Ledger Live under "Device Settings." Connect your device and follow the prompts.
During an update, the device screen shows "Update in progress." Do not unplug the cable. Interrupting an update can brick the device. The process takes about 5 minutes. After completion, your apps and accounts remain intact.
You can also change device settings. Adjust the screen brightness, set a lock timer, or enable Bluetooth. The lock timer automatically locks the device after inactivity. This prevents unauthorized use if the device is lost.
Firmware Update Checklist
- Back up your seed phrase before updating.
- Close all other applications.
- Connect device directly to computer (no hubs).
- Ensure battery is above 50% for Nano X.
- Do not disconnect during the process.
Frequently Asked Questions About Ledger Setup
How long does the setup take?
Initial setup takes about 15 to 20 minutes. Installing apps and adding accounts adds another 10 minutes.
Can I use the same seed phrase on multiple devices?
Yes. You can restore the same wallet on multiple Ledger devices. This is useful for backups.
What happens if I lose my device?
Buy a new Ledger device and restore using your 24-word seed phrase. Your funds are safe.
Is Bluetooth safe to use?
Yes. Bluetooth connections are encrypted. The private key never leaves the device.
Can I stake coins from Ledger Live?
Yes. Ledger Live supports staking for several coins including Tezos, Cosmos, and Solana.
How do I reset the device to factory settings?
Enter the wrong PIN three times. The device wipes itself. You can then restore with your seed phrase.
For authorized purchases, find a trusted Ledger reseller near you. Avoid third-party marketplaces like eBay. Counterfeit devices are common there.
Ready to buy? Check out the latest Buy Ledger Nano S Plus deals. This model offers great storage and a lower price point.